
How to Measure Windows for No Drill Shutters
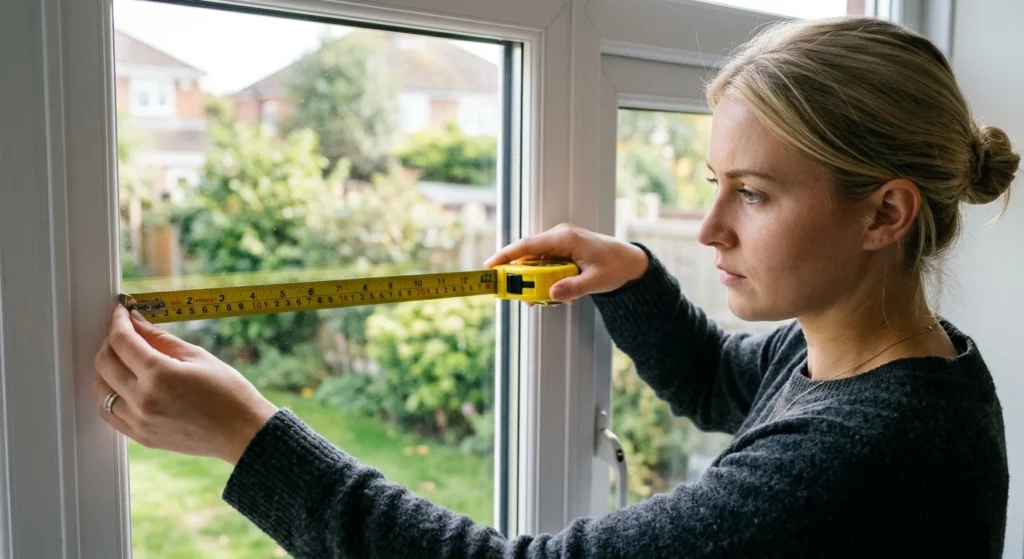
Getting the measurements right for no drill shutters
Measuring for no drill shutters involves a slightly different approach from measuring for conventional window shutters. Rather than measuring the entire window opening, you’ll need to focus on the glass, the surrounding rubber beading and the available space around it.
With a tape measure and a few notes, you can record the key dimensions and check whether your windows are suitable. It’s also important to look for potential obstructions and allow for the clearance needed by the fitting brackets, as these details can make all the difference when choosing a no drill shutter system.
Before you start measuring
It helps to have the following to hand:
- A steel tape measure for taking the window dimensions
- A notepad and pen, or your phone for keeping a record
- A credit or bank card to help check the rubber beading and frame depth
- A suitable step ladder if you need to reach the top of a taller window
- Someone to help with measuring for wider windows
Before taking any measurements, it’s worth checking that your windows are suitable for the type of no drill shutters you’re considering.
Many no drill shutter systems are designed for uPVC windows and doors, although compatibility can vary depending on the product and bracket design. Some require a particular type of rubber beading around the glass, while others have specific requirements for the depth and shape of the window frame.
Take your time when measuring and work in millimetres rather than centimetres. It’s also worth having a clear view of the entire window before starting, so you can identify any handles, vents or other features that could affect the fitting.
How to measure a standard uPVC window
Step 1 – Check your window is suitable
No drill shutters generally attach to the window frame using brackets that slot into or around the existing rubber beading. This means the design of your window frame is an important part of determining whether the system will work.
Start by looking at the rubber seal surrounding the glass. On suitable windows, there is often a gap between the glass and the rubber beading that allows the fitting brackets to be inserted.
Some suppliers suggest gently sliding a bank card between the glass and the rubber beading to check whether there is sufficient space. The required gap varies between products, so check the supplier’s guidance before deciding whether your window is suitable.
You should also check:
- The rubber beading is suitable for the fitting brackets.
- The window frame has enough depth to accommodate the brackets.
- There is sufficient clearance around the glass.
- Handles, vents or other obstructions won’t interfere with the shutters.
If your window has an unusual frame, very narrow beading or limited space around the glass, contact the supplier before ordering. It is much better to establish suitability at this stage than discover a fitting problem after your shutters have arrived.
Check the clearance around the glass
Measure the available space between the edge of the glass (excluding the beading) and any nearby obstructions, such as window handles, hinges, vents or raised sections of the frame. As a general guide, you may need approximately 23-25 mm of clear space around the glass to accommodate the shutter and its fitting brackets.
Measure this distance in millimetres (mm), checking all four sides of the glass. Pay particular attention to areas where handles or other fittings project towards the glass, as these may restrict the available space.
Step 2 – Measure the glass width
Unlike traditional shutters, which are measured across the window recess, no drill shutters are generally measured using the visible glass area.
Measure horizontally from the inside edge of the rubber beading on one side to the inside edge on the other side. Do not include the rubber beading or seals in your measurement.
Take three width measurements:
- At the top of the glass
- Across the middle
- At the bottom
Record all three measurements in millimetres. As window frames and glass panels are not always perfectly square, there may be slight differences between the figures.
For many no drill shutter systems, the smallest measurement is used as the reference width. However, always check the instructions for your chosen product before entering your dimensions or making any adjustments.ht above or below the opening needed to achieve the coverage you want.
Step 3 – Measure the glass height
The height is measured in much the same way as the width, using the visible glass area between the inside edges of the rubber beading.
Take three measurements vertically:
- Down the left side
- Through the centre
- Down the right side
Again, record all three measurements in millimetres. If the figures differ, the smallest is commonly used as the reference measurement, subject to the supplier’s instructions.
Remember that you are measuring the visible glass only, not the overall height of the window frame or the surrounding recess.
Step 4 – Check the frame depth
The depth of the window beading is another important measurement, as it helps determine which fitting bracket is suitable for your window.
A simple way to check this is to place a bank card or similar flat object across the front corner of the window frame. Measure the distance between the glass and the outer edge of the card.
This gives you an indication of the depth available for the fitting bracket.
Different no drill shutter systems use different bracket sizes, so compare your measurement with the options offered by your chosen supplier. If the depth falls outside the available range, the shutters may not be suitable for your window.
Step 5 – Check handles and other obstructions
Before finalising your measurements, look carefully at the position of any window handles, vents, locks or other features that could interfere with the shutters.
No drill shutters sit directly against the window frame, so there needs to be sufficient space for the panels and brackets to fit without obstructing the operation of the window.
Pay particular attention to handles that project outwards or sit close to the edge of the glass. Some suppliers offer handle cut outs or alternative configurations, but the available options will depend on the product.
If handle clearance is required, you may need to record the position of the handle in relation to the glass. Check the supplier’s measuring instructions to establish exactly where these measurements should be taken and whether a cut out is available.
Step 6 – Measure each glass panel separately
If your window or door has more than one glazed section, don’t assume that all the panes are identical.
Each separate pane may require its own shutter, so measure the visible glass width and height individually. This is particularly important for French doors, patio doors, bay windows and windows with multiple glazed sections.
Even where the panes appear to be the same size, small differences can occur. Recording each measurement separately helps ensure that the correct dimensions are used when ordering.
Recording your measurements
Once you’ve completed the measuring process, keep all your figures together so they’re easy to refer to when ordering. A simple table can help you record each pane individually, along with any additional details about the window.
| Window reference | Glass Width | Glass Height | Frame Depth | Notes |
|---|---|---|---|---|
| Living room (left) | ||||
| Living room (right) | ||||
| Bedroom (main) | ||||
| Kitchen |
Keep your original measurements, including the three individual width and height readings, rather than recording only the smallest figures. This gives you a useful reference if you need to double check anything with the supplier.
Recording your measurements
Before submitting your measurements, take a few minutes to go through everything again. Check that you’ve measured the visible glass rather than the window recess, recorded each separate pane and included any additional information about handles or other obstructions.
Most importantly, refer to the measuring and fitting instructions for the specific no drill shutter system you’ve chosen. Requirements can differ between suppliers, particularly when it comes to rubber beading, bracket depth, clearance around the glass and whether any measurement deductions are needed.
If anything is unclear or your measurements don’t seem to match the supplier’s requirements, ask for advice before placing your order. Some companies can also review photographs of your windows to help establish whether their shutters are suitable.
Taking a little extra care at the measuring stage can make the ordering and fitting process much more straightforward, helping you avoid unnecessary complications when your no drill shutters arrive.
Measuring for no drill shutters, fully explained…
Measuring for no drill shutters involves a slightly different approach from measuring for conventional window shutters. Rather than simply recording the width and height of the window opening, you’ll need to pay close attention to the glass, the surrounding beading and the space available for the fitting brackets. These details help establish whether the system is suitable for your window and whether there is enough clearance for the shutters to be installed correctly.
Why the glass measurements matter
No drill shutters are designed to fit directly over the glazed area of the window, so the dimensions of the glass are an important starting point. Measuring the width and height at several points helps identify any variations and gives you a clearer picture of the area the shutters will cover.
The surrounding rubber beading is also important. This forms the boundary around the glass, and the measuring instructions will usually specify exactly where to position your tape measure in relation to it. Don’t assume that the visible glass and the full glazed area are interchangeable measurements; follow the supplier’s guidance carefully.
Checking the clearance around the glass
Having enough space around the glass is just as important as getting the width and height right. The shutter system needs room for its brackets and fixing components, so nearby handles, hinges, vents and raised sections of the window frame can affect whether it will fit.
As a general guide, check for approximately 23–25 mm of clear space around the glass, measuring in millimetres (mm). Check all sides rather than assuming the clearance is the same around the entire window. Pay particular attention to handles and other fittings that may project into the space needed by the shutter.
This clearance is a useful initial check, but the exact requirement can depend on the product and its fitting system. Always compare your measurements with the supplier’s specifications before ordering.
Why the window frame and beading matter
The type and shape of your window frame can influence whether no drill shutters are suitable. The system relies on fitting components sitting securely around the glazed area, so the condition, profile and dimensions of the rubber beading may all be relevant.
Some windows have particularly narrow or shallow beading, while others have raised sections or uneven profiles. These details can affect how the brackets sit and whether the shutter can be fitted as intended. If you’re unsure, take a close look at the frame and make a note of anything that might interfere with the fitting.
Common measuring mistakes to avoid
A few simple checks can help prevent problems when measuring for no drill shutters:
- Measuring the whole window instead of the glass: Check where the supplier expects you to take the width and height measurements.
- Ignoring the rubber beading: Its position and profile can affect the measuring and fitting process.
- Forgetting the clearance around the glass: Check for the required space on all sides, including around handles, hinges and vents.
- Assuming every window is the same: Measure each window or glazed section separately, even if they look identical.
- Mixing up measurements: Record all dimensions in mm and label each window clearly.
- Using another supplier’s measuring guide: Different no drill shutter systems can have different requirements, so don’t assume the same measurements or allowances apply to every product.
Taking a little extra time to check these details can help identify potential fitting issues before you place an order.
What to do once you’ve measured your windows
Once you’ve recorded the glass dimensions and checked the available clearance, you’ll have a better idea of whether no drill shutters could be suitable for your windows. Keep your measurements and notes together, including any details about the beading, handles or other obstructions.
The next step is to compare your measurements with the fitting requirements for the particular product you’re considering. Suppliers may use slightly different measuring methods, specify different clearances or provide their own guidance on suitable window frames. Some may also ask for additional measurements or photographs to help check suitability.
If anything is unclear, contact the supplier before ordering. A measurement that appears suitable on paper doesn’t necessarily guarantee that the brackets will fit or that the shutters will operate correctly once installed.
Careful measuring is therefore about more than getting the dimensions right. It’s also about checking the window itself, understanding the fitting requirements and making sure the chosen no drill shutter system is suitable for the job.at to check next, you’ll be better prepared to choose the right approach for your home.