
How to Measure Windows for Shutters
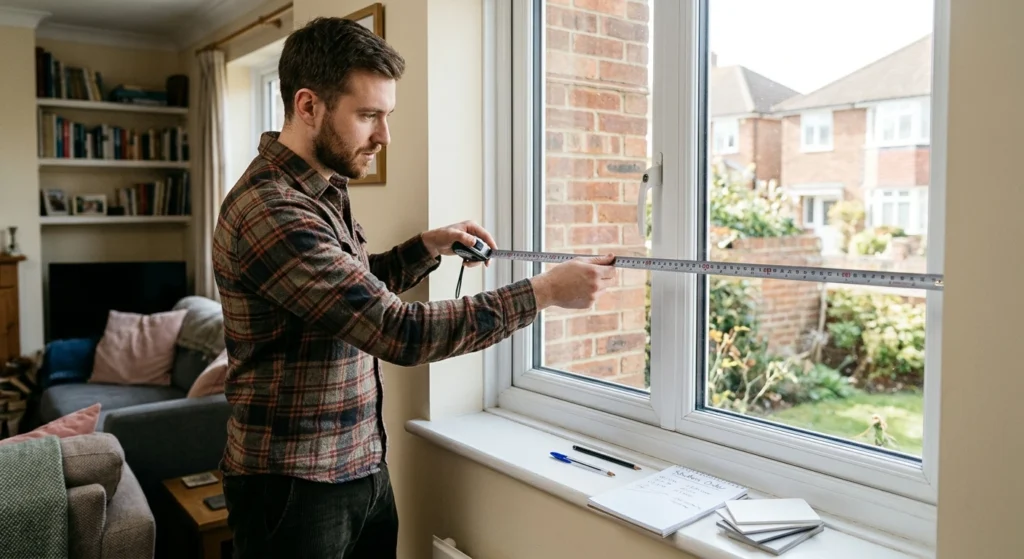
Getting the measure of your windows
Measuring your windows is a useful first step when planning for shutters. Whether you’re preparing for a professional installation or considering fitting shutters yourself, understanding your window sizes can help you explore your options, compare prices and plan your project.
With a tape measure and a few notes, you can get a good idea of the dimensions you’re working with. The measurements needed for ordering shutters can be more specific, however, so it’s important to understand what to measure and how to use the results.
🧮 Got your window measurements? Use our shutters cost calculator to see an indicative price range based on your window sizes, preferred material and installation option.
Before you start measuring
You’ll find it helpful to have:
- A steel tape measure
- A pencil and paper, or a phone to record your measurements
- A step ladder if you need safe access to the top of a window
- Someone to help hold the tape measure for wider windows
You don’t need specialist equipment to get started. A few everyday items and a little preparation are usually all you need.
Measure in millimetres where possible, and write down every measurement as you go. It’s worth measuring each window individually, even if several look identical, as small differences in size are common.
Before you begin, take a look at the window itself. Note any handles, locks, vents, projecting sills or other features that might affect where the shutters can sit. These details can be just as important as the window’s overall dimensions.
Inside or outside the window recess?
Before taking measurements, it helps to understand where your shutters might be fitted. Depending on the window and the shutter system, they may sit inside the recess or be mounted outside it.
Inside the recess
Shutters fitted inside the recess sit within the existing space between the room’s wall and the window. This can create a neat, built in appearance, with the surrounding window area remaining visible.
The available depth is important here. Handles, window frames and other obstructions can affect how much room there is for the shutter frame and panels to fit and operate. Measuring the recess helps establish whether this option is worth considering.
Outside the recess
Shutters fitted outside the recess sit on the wall or window surround, covering some or all of the area around the window. This can be useful when the recess is too shallow or when an inside fit would be obstructed.
For this option, you’ll need to consider the area you want the shutters to cover, rather than measuring only the opening itself. The position of nearby walls, furniture, handles and other features may also affect the layout.
You don’t necessarily need to settle on a mounting option before measuring. If you’re arranging a professional installation, your measurements can help start the conversation. If you’re buying DIY shutters, follow the supplier’s instructions to establish which measurements and fitting options are suitable for its products.
How to measure a standard window
For a straightforward rectangular window, start with the overall width and height. If you’re exploring an inside recess fit, it’s also useful to measure the available depth.
Step 1 – Measure the width
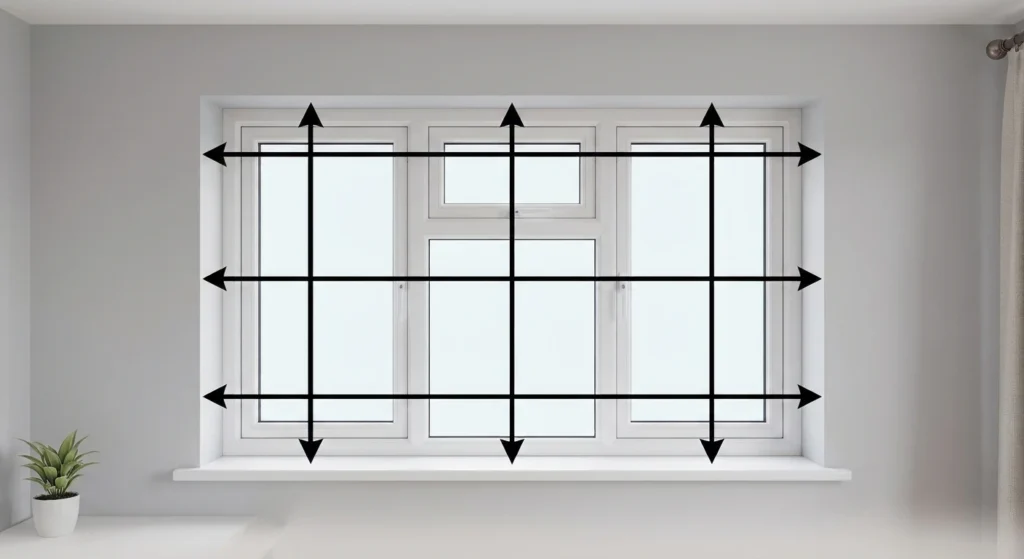
Measure horizontally across the window recess in three places:
- Near the top
- Across the middle
- Near the bottom
Record all three measurements in millimetres. Windows and recesses aren’t always perfectly square, so the width can vary slightly from one point to another.
For an inside recess fit, use the smallest measurement as your reference. Keep all three figures, though, rather than relying on a single number. The final measurement requirements will depend on the shutter system and its fitting instructions.
For an outside recess fit, use the largest measurement as your reference. Think about how far beyond the opening the shutters might need to extend, rather than automatically assuming the recess measurements alone will give you the coverage you want.
Step 2 – Measure the height
Measure vertically from the top of the recess to the bottom in three places:
- Along the left side
- Down the centre
- Along the right side
Again, record all three measurements, as the height can vary slightly from one point to another. Pay attention to the window sill. If it projects into the room or slopes, note its shape and position, as this may affect the way the shutters are fitted and how they operate.
For an inside recess fit, use the smallest measurement as your reference to allow for variations in the height of the opening.
For an outside recess fit, use the largest measurement as your reference, then consider any additional height above or below the opening needed to achieve the coverage you want.
Step 3 – Check the depth (inside the recess only)
If you’re considering fitting shutters inside the recess, measure how much depth is available from the front of the recess towards the window.
Check this at a few points, as the depth may not be consistent. Note anything that projects into the space, such as window handles, hinges or vents.
Recess depth can influence the frame, panel configuration and louvre size that will work for your window. Larger louvres may need more clearance to open fully, although the space required varies between shutter systems.
Don’t assume that a recess is suitable simply because it looks deep enough. If you’re buying DIY shutters, check the manufacturer’s minimum depth and clearance requirements before choosing your specification.
Step 4 – Note any obstructions
Look carefully at the whole window and the surrounding area. Handles, locks, window stays, vents, radiators and projecting sills can all affect the position or operation of the shutters.
Make a note of anything that might get in the way, including how far it projects and where it sits in relation to the window. Photographs can also be helpful when discussing your measurements with an installer or supplier.
Step 5 – Check your measurements
Read through your notes and check that each figure is clearly recorded against the correct window. If something looks unusual, measure it again.
You can also measure diagonally from one corner of the recess to the opposite corner in both directions. If the diagonal measurements differ, the opening may not be perfectly square. This isn’t unusual, particularly in older properties, but it’s useful information to record.
You don’t need to work out how to correct these differences yourself. The aim is to understand the window you’re dealing with and record anything that might affect the finished fit.
The six recommended window measurements
Remember, measuring your window in six places helps identify any variations in its width or height. Even windows that look perfectly square can have slight differences, particularly in older properties where walls and window openings may have shifted or settled over time.
Taking three width measurements and three height measurements helps ensure these differences aren’t missed. This is important when ordering made to measure shutters, as uneven openings can affect how they fit and operate.
Measuring bay, sash and unusual windows
Not every window is a simple rectangle. Bay windows have several connected sections, while arched and other specially shaped windows can require a more tailored approach.
Bay windows
Measure each section of the bay individually, recording its width and height at several points wherever you can access them. Label the sections clearly, such as left, centre and right, and make a rough sketch showing how they connect.
The angles between sections are also important because they affect how the shutters and frames meet. You don’t need to calculate these angles for an initial estimate, but noting the arrangement and taking photographs can be helpful.
Box bays and angled bays have different layouts, so avoid treating the whole bay as one large window. If you’re considering DIY shutters, check how the supplier wants bay sections measured and whether it provides specific instructions for joining frames at angles.
Sash windows
With sash windows, consider how the moving sections operate and whether anything could interfere with their movement once the shutters are fitted.
Measure the opening and recess as described above and note the position of the sash frames, handles and any projecting hardware. The final arrangement will need to suit both the window and the shutter system.
Special shape windows
Arched, circular and other unusual windows may require more than simple width and height measurements. The shape of the opening, the curve or angle involved, and the way the shutter frame can be fitted all influence what is possible.
For an initial assessment, record the widest and tallest points, take photographs and sketch the outline where helpful. These measurements alone won’t necessarily be enough to order a made to measure shutter, so seek guidance from the installer or DIY supplier before proceeding.
Keep a record of your measurements
Keeping your measurements organised makes it easier to compare windows and discuss your plans with a professional or supplier. You can use a simple table like the example below to record each window’s dimensions and any details worth noting.
| Window reference | Width | Height | Depth | Notes |
|---|---|---|---|---|
| Living room (left) | ||||
| Living room (right) | ||||
| Bedroom (main) | ||||
| Kitchen |
Add further rows for each window, and keep the original measurements if you take additional ones later. Include any relevant notes about handles, sills, unusual shapes or potential obstructions.
📏 Interested in no drill shutters? These shutters require a different measuring technique, so take a look at our no drill shutters measuring guide before getting started.
Measuring for shutters, fully explained…
Measuring doesn’t have to be complicated, but it’s worth understanding what your measurements can tell you and where further advice may be needed. The process is different depending on whether you’re preparing for a professional installation or planning to fit the shutters yourself.
Why measure your windows before choosing shutters?
Taking your own measurements can give you a better understanding of your windows before you start comparing styles, materials and prices. They can also help you estimate the cost using our shutters cost calculator and work out whether you’re dealing with straightforward windows or openings that may need a more specialised solution.
If you’re planning to use a professional installer, approximate dimensions can be useful when discussing your requirements and obtaining an initial quotation. The installer can then assess the windows properly and establish the precise measurements needed for the chosen shutters.
If you’re considering DIY shutters, measuring your windows gives you a useful starting point before choosing a product. It can help you understand the sizes involved, but the supplier’s own instructions should determine exactly how each window needs to be measured.
Why width, height and depth all matter
Width and height establish the overall dimensions of the window or the area you want the shutters to cover. Measuring in several places helps reveal variations that might not be obvious at first glance.
Depth is particularly relevant when shutters are intended to sit inside the recess. There needs to be enough space for the chosen frame and panels, while allowing for handles, hinges and other obstructions. The amount of clearance required can vary according to the shutter design, frame and louvre size.
These measurements work together. A window may have plenty of width and height but still present a challenge if its recess is shallow or its handles project into the space where the shutters need to sit.
Choosing the right measuring approach
For an initial assessment, consistency is more important than trying to make every measurement fit a particular set of ordering rules. Record the width and height at several points, note the available depth where relevant, and keep any additional details that might influence the installation.
The way you use the measurements depends on your plans. A professional installer may use them to understand the project before visiting your home, while a DIY supplier may ask you to follow a particular method for measuring the opening, frame or finished shutter dimensions.
Don’t assume that every supplier uses the same allowances or measuring method. Some systems may require specific deductions or additional measurements, while others use different frame configurations. Always follow the instructions for the product you’re considering rather than applying a general rule to every shutter.
Common measuring mistakes to avoid
A few simple precautions can help you get more useful results:
- Measuring only once: Take each measurement carefully and repeat it if anything seems unusual.
- Assuming every window is identical: Measure each one separately, even when they appear to be the same size.
- Forgetting the depth: An inside recess fit needs enough space for the chosen shutter system and any projecting hardware.
- Overlooking obstructions: Handles, locks, vents and sills can affect the position and movement of the shutters.
- Mixing up measurements: Label each window clearly and keep width, height and depth figures separate.
- Using the wrong measuring method for the product: Check the relevant instructions before using your measurements to place an order.
Taking a little extra time to record the details can make the next stage easier and help you identify questions that need answering before you commit to a particular design.
What to do once you’ve measured your windows
If you’re planning a professional installation, your measurements can help you explain the scope of the project and get an initial idea of the cost. A home survey can then establish the details of your windows, assess suitable fitting options and confirm the measurements needed before the shutters are made.
If you’re going down the DIY route, use your measurements to begin exploring suitable products, then follow the supplier’s instructions for the exact measuring process. Check whether the supplier provides guidance for your window type, explains how to account for frames and obstructions, and offers help if you’re unsure about any part of the process.
Measuring your windows is a useful first step, not a guarantee that a particular shutter will fit. By recording the dimensions carefully and understanding what to check next, you’ll be better prepared to choose the right approach for your home.